Leaderboard
728x15
Showing posts with label crafts. Show all posts

Portable Dry Erase Drawing Kit

Make a Portable Dry Erase Drawing Kit for Kids using a Thirty One Beauty Bag!

My boys love the DIY Coloring Book we made earlier this week and they are always asking to play with it! We had a doctor's appointment and they wanted to take it along, but it's a little big and cumbersome for travel. I decided we needed a portable solution that will let them draw and color when we are away from home. I made this kit from a Thirty One Beauty Bag and it is the best thing to take when we need a quiet, screen free activity on the go!

This post features a product from Thirty One Gifts. I am an Independent Consultant for Thirty One, so I do make commission if you choose to buy any of the products from my Thirty One website. However, I was not compensated in any way for this article and all of the products shown are ones that I personally own and use in my home. Read my full disclosure policy.


Our portable dry erase drawing kit is made from a Timeless Beauty Bag, and it took just a couple of minutes to put together. 

There are 2 large PVC pockets on either end. I cut a piece of card stock (paper is fine too, I prefer card stock to give it a little strength) to fit - 6.5 inches by 9.5 inches - and slipped it inside each pocket.  You can also use pages from a favorite coloring book or printable coloring pages. You can find links to over 100 free printable pages here.


In the center, there is a small pocket which is a perfect fit for dry erase crayons.  

There are also elastic loops which hold our markers. I included a small marker with an eraser tip too (though my kids love to erase with their hands, which is why I buy the washable dry erase markers).

Now they are ready to color! The dry erase markers and crayons work perfectly on the PVC windows, so they can draw, erase, and start again.


And the best part, it folds neatly and snaps shut to make it easy to carry and travel. We take it to doctor appointments, restaurants, anywhere that we need some quiet, screen free entertainment. We even use it at home for quiet time!


My Timeless Beauty Bag is from an older catalog, it is available now in these 4 patterns:

You can find the Timeless Beauty Bag in the "Accessories" section of my Thirty One website. It can be personalized too for a small additional cost. 

Looking for more great ideas using Thirty One products? Visit my Organizing page!

Find washable dry erase markers and crayons on Amazon! (affiliate links)


DIY Reusable Coloring Book Plus 100+ Free Coloring Pages


My boys love to color. But they are still pretty little, so sometimes "coloring" means drawing a few squiggles and then asking for a new page. Those coloring books can add up! I love using free printable pages (and will share some favorites at the end of this post) but paper and ink can get pricey too. I found a great way to keep my boys happy and save some money by making our own reusable coloring book!


This project is so easy - you might have everything you need at home already!


All you need is:
  • 3 Ring Binder
  • Sheet Protectors (I like Heavyweight or Super Heavyweight)
  • Coloring Pages or plain paper
  • Dry Erase markers or crayons - get the washable kind!

Put your coloring pages or plain paper in the sheet protectors. You can print free coloring pages online (keep reading for links to some of my favorites) or tear them out of a coloring book. You can put them in the sheet protectors back to back or I like to do a single sheet in each protector so that you have a mix of pre-printed pictures and blank pages.

One of my favorite parts of this book is that you can totally customize it to your kids' favorite characters, holidays, whatever they like!


Once your pages are loaded just place them in your 3 ring binder. Make it as large or small as you'd like! 

I love binders that you can slip your own cover into. If that's what you have, I've made you a free printable cover too:
CLICK HERE to download your free cover.

Once everything is assembled you are ready to go. Give your kids some washable dry erase markers or crayons and let them color!


One of my boys LOVES to erase his art - it wipes off with a paper towel but you may need to give it a good cleaning with water (or a baby wipe!) every now and then to keep it totally clean.


Ready for more coloring!


Again, you can fill your book with anything that your kids will enjoy. I've pulled together some of my favorite free coloring page resources to give you a head start:

90+ Coloring Pages from Kids Activities Blog

70 Coloring Pages from My Life & Kids

Huge Coloring Page Collection (great holiday sets!) from What Do We Do All Day?

Coloring & Activities Collection from Every Star is Different

Horse Coloring Page from Arts & Crackers

Apple Coloring Pages from The Good Long Road

Space Coloring Pages from In the Playroom

Snowflake Coloring Pages from In the Playroom


Dinosaur Coloring Pages from Red Ted Art

Penguin Coloring Pages from Kid's Creative Chaos

Design Your Own Monster Truck from School Time Snippets

Number Coloring Pages from 3 Dinosaurs

Dolphin Coloring Pages from Itsy Bitsy Fun

And you can find your favorite character sets here:


Need any supplies to make your coloring book? Here you go! (affiliate links)


Easy Paper Heart Banner Craft


After a week of being stuck inside with colds, we needed to do some happy Valentine's Day decorating. I thought our mantle was the best place to start, and since my boys are really into drawing with markers right now, this was the perfect easy craft for us to try. This craft would also work great in a playgroup or preschool setting, as each kid can decorate their own heart.


All you need for this craft is red & pink construction paper, markers/crayons/paint - whatever you want to decorate your hearts, and paper fasteners.

Start by cutting out large hearts from red & pink construction paper. I make hearts like I learned as a kid myself - by folding lengthwise, drawing half a heart, cutting it out, and unfolding.


You can make as many as you'd like for the length of your banner. I did 12 total for my mantle (6 of each color).


Then let the kids go crazy decorating their hearts. My boys love coloring with markers right now, so that's what they wanted to do. You can do painting, crayons, glitter and glue - be creative!


Once all your hearts are decorated, secure them together with the paper fasteners. I alternated red and pink.


That's it! Your banner is ready to hang. I used clear command strips to hang mine but you can use tape as well.


Our snowman looks much happier now and ready for Valentine's Day!

This was a really simple and customizable craft that is a lot of fun for kids of all ages. We had a great time putting it together and now we're ready for Valentine's Day!

Do you have a lot of craft supplies? Check out my Complete Craft Storage Solution!

Need any supplies for this project? Here you go: (affiliate links)


Complete Craft Storage Solution


As you can tell if you spend any time on this blog, we do a lot of crafts in this house! The more we do, the more my craft supplies seem to multiply. I would love to have a dedicated room for crafts but we just don't have the space. And, with toddlers in the house, I can't leave all our supplies in the playroom without risking paint on the walls the moment I turn my back. I needed a solution that was functional, portable, and would look good sitting in my foyer or dining room. I finally found one and I'm happy to share it.


I put together this craft storage solution with products from Thirty One Gifts. I am an Independent Consultant for Thirty One, so I do make commission if you choose to buy any of the products from my Thirty One website. However, I was not compensated in any way for this article and all of the products shown are ones that I personally own and use in my home. Read my full disclosure policy.

I started with a Deluxe Utility Tote and 2 Essential Storage Totes.


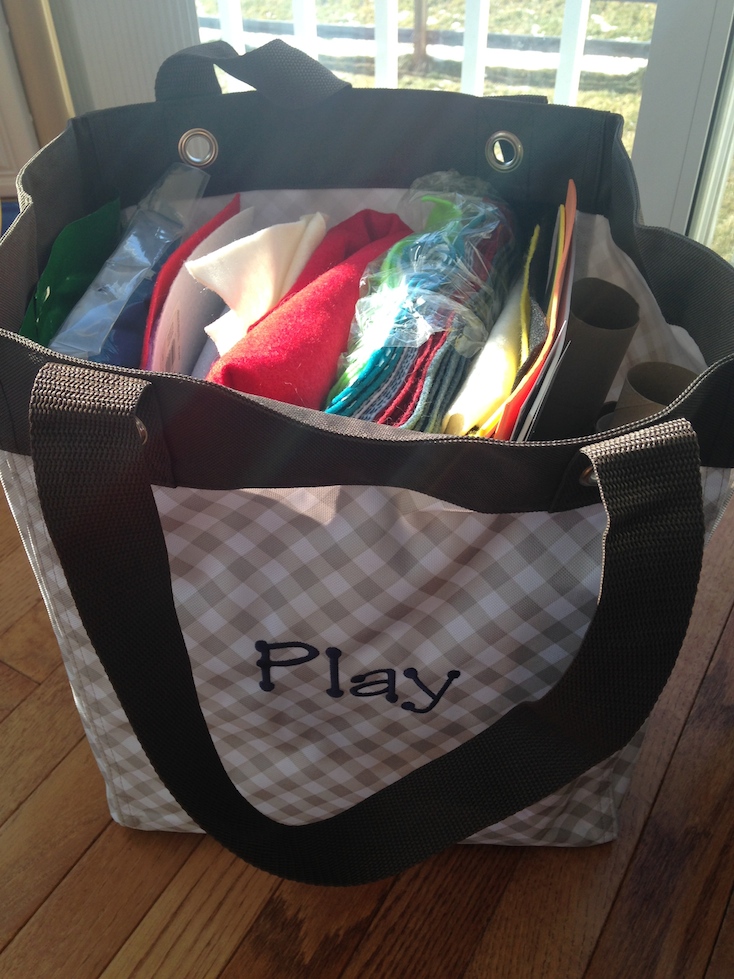
In my first Essential Storage Tote, I put all my felt, craft foam, papers, and cardboard tubes (the best craft material ever!)


Next I organized my smaller items, starting with a Handle It Cosmetic Bag for paint. I love this bag because the inside is completely lined with PVC, so spills are no problem. There are 2 pockets (1 interior, 1 exterior) for brushes too. So if we do a paint project I can just grab this small bag and go.


A Littles Carry-All Caddy for crayons. Again, I can just grab this by itself if we are going to color.


And a new product that I LOVE - the Double Duty Caddy for all those odds and ends - glue, tape, ribbon, scissors, etc. It holds a lot of stuff!


All 3 of these fit nicely inside my second Essential Storage Tote, with a little room to spare! 


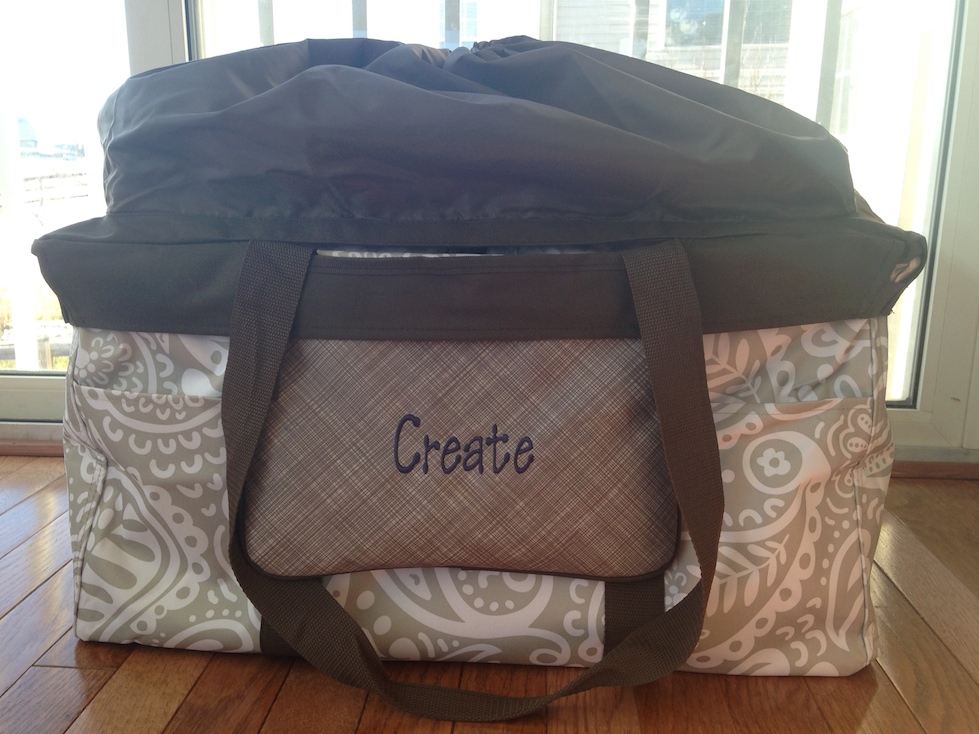
Once both of my Essential Storage Totes were filled, I put them inside the Deluxe Utility Tote. A perfect fit!


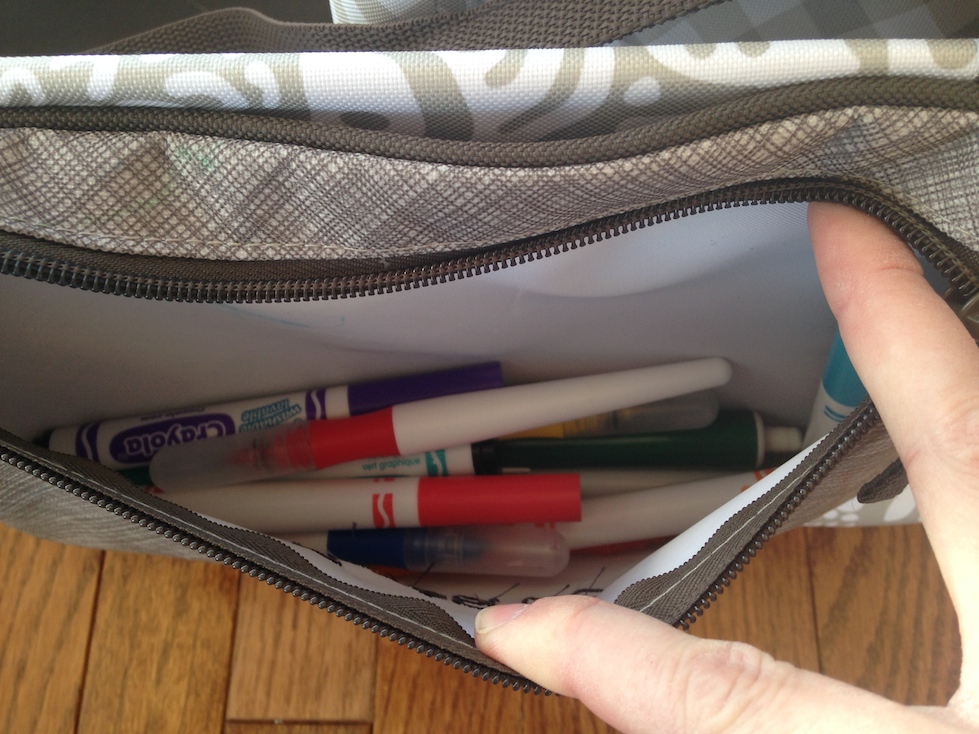
I added a Pocket A Tote to the front for markers. This pocket snaps on and off the grommets on the Deluxe Utility Tote so I can grab it separately, and it is lined so I'm not worried if a cap comes off.


Finally, I added a Deluxe Cinch Top lid so that everything was contained and covered. 


I truly love this system for organizing craft and art supplies. When we are working on a project, I can easily carry the entire thing into the room or just grab the bag that holds the supplies that I need. I also love that I could choose prints that go with the decor in my house so I don't mind if it is sitting out in the living room or the dining room.

And, I was able to add the "Play, Create, and Imagine" personalization to make it my own, and inspire my creativity.

All of these pieces come in many different colors, solids, and prints (since these are my own products, purchased at different times, some of the prints shown may no longer be available) and can be mixed and matched to create a look that is perfect for your home. And, personalization is available on each product! (for an additional cost)

I hope this helps inspire you to organize your craft or art supplies, and perhaps part or all of this solution is right for you! To shop these products, visit my Thirty One website.  Or email me with questions or suggestions of other products to help you get organized. Happy crafting!


Bubble Wrap Painting

Painting on Bubble Wrap

We had so much fun making our Bubble Wrap Road that I thought there must be something else we can do with our big roll of bubble wrap. My boys love to paint, so why not put the two together and see what happens?

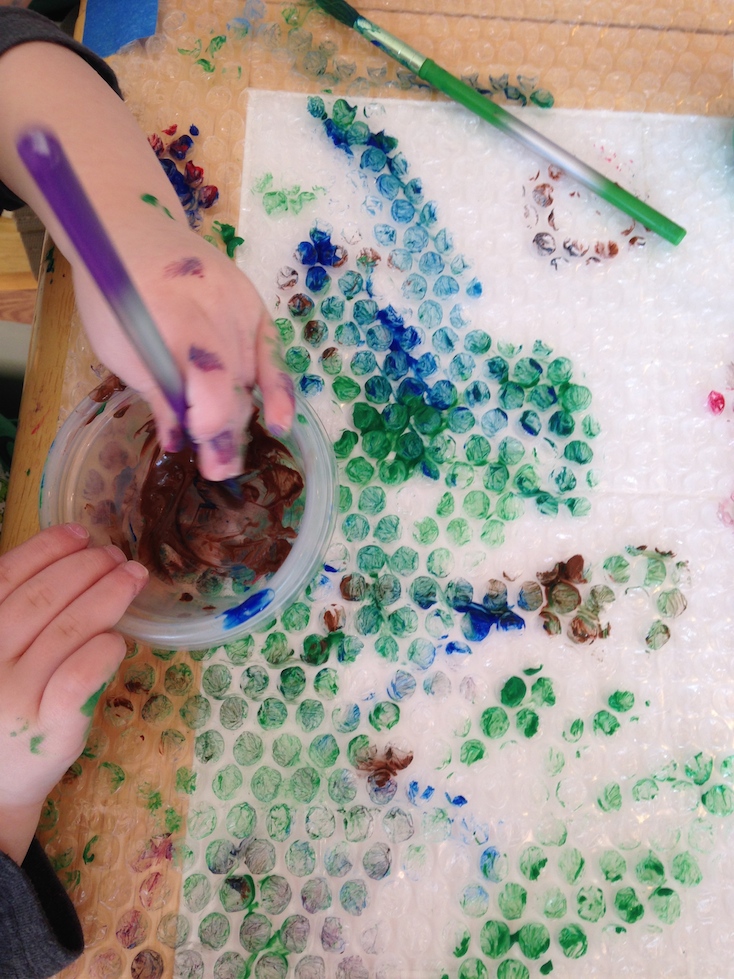
We had a lot of fun with this craft, and it's pretty simple to set up. I put a big sheet of bubble wrap down on our kitchen table and taped it down with painter's tape. I poured some washable paint into small cups, put out some brushes, and invited the boys to create.


They started with the brushes and loved how bumpy their "canvas" was.


Then they really got into it and started mixing colors.


They asked for more colors and of course I obliged.


Then they gave up the brushes all together and started finger painting. It was fun to pop the bubbles and make art at the same time! Even my "no mess" boy got into this one.


I hung our finished project on the sliding glass door to dry, and it was quite pretty with the sun shining through! We could easily turn this into a sun catcher craft. 


This was a great project that checked all my favorite boxes - easy, inexpensive (save those packing materials!), sensory and fun. Both of my boys enjoyed it immensely and we will definitely try it again!

Need any of the materials used in this activity? Here you go! (affiliate links)


Looking for craft storage? Check out my Organizing & Totes page!


Cupid's Mailbox Activity with Free Printable Valentine Cards


My Santa's Mailbox has been my most popular activity on the blog so far, and it was one of our favorites around Christmas. Now that Valentine's Day is coming up I thought we'd make one for our Valentines too!

This is a very easy craft that turns into a fun activity for toddlers and preschoolers. It would work great in a pre-school classroom setting for collecting Valentine cards, or at home just for fun! And it recycles a baby wipes box, which makes it frugal too.

To make the mailbox, you will need:

  • Empty baby wipes box. A tissue box will also work but it will not be as sturdy and may not last for long.
  • Red, pink, and white felt.
  • Mod Podge or other fabric glue
  • Scissors

Directions:

Cut out a piece of red felt large enough to wrap around the base of your wipes box. I used a Huggies box and mine was 3.75" x 23". Coat the base of the box in Mod Podge and wrap the red felt around. Trim any excess around the bottom.


Cut out heart shapes from the pink and white felt. I do hearts like I learned in kindergarten, by folding the felt in half and cutting a half-heart around the fold. It's the only way I can make them even.


Coat the backs of your felt hearts with Mod Podge and adhere to your box. If your felt is thin, you may have some glue leak through, so apply sparingly. I glued a few to the top too. Allow to dry.


Your mailbox is done! Now you need some Valentines to put inside. I've put together a set of printable cards that can be cut to fit through the top (depending on your box of course). Print these out on card stock for best results.


Now you're ready to play! Your toddler will have lots of fun putting the cards into the mailbox. 


And you can play a fun matching game with the cards! Put one of each kind in the mailbox, then show your toddler a card and have him find the match. You can also have them draw their own Valentines for friends and family to keep inside their mailbox.

Lots of fun possibilities!  Happy Valentine's Day!

Need any of the materials used in this craft? Here you go: (affiliate links)


Need help organizing your craft supplies? Check out my Organizing & Totes page!

Coffee Cup Snowman


We love snowmen in my house. I have lots of snowman decorations around the house in the winter, and of course, Olaf has become a very big celebrity with my boys.

I also love coffee. As I was making myself a cup this morning, I looked at my K-cup and thought hmmm... this could become part of a snowman (the mind of a blogger, right?). Since we have been stuck inside the house this week with colds and frigid temperatures I will take just about anything and make it into a craft project.


I cleaned out my K-cup, grabbed a few other things from my craft bin, and we made this really cute, easy snowman craft. It was great fine motor practice for my boys and turned out really well!


Please note: this activity features small parts. Children should be closely supervised when doing this craft. This craft may not be appropriate for all children.

You will need:


Clean, used K-cup
Black marker
Styrofoam cup
3 paper fasteners
3 pipe cleaners - 2 brown and one color of your choice

Directions:

Remove the foil, coffee, and liner from your K-cup. Thoroughly wash and dry.  Flip upside down, and draw on a face with black marker.


Thread a colored pipe cleaner through the hole in the top of the K-cup. Twist the top portion into your desired shape for a hat (ours was a bow). Be sure there is enough of the pipe cleaner coming through the bottom to stick through the styrofoam cup (at least an inch).

Now let your child assemble the snowman!

Have them punch the paper fasteners into the styrofoam cup for the buttons.


Push the 2 brown pipe cleaners into the sides of the cup to make arms. Twist the ends so that they form a V for hands.


Push the head onto the top of the cup, pushing the end of the pipe cleaner through the top to secure the head to the base.


All done! A happy snowman! He is now ready to join the rest of my snowman decorations. Since this craft does have small pieces, he is definitely a decoration and not a toy.

Like this snowman craft? Try my Build a Snowman Busy Bag next!

Need any of the materials used in this craft? Here you go! (affiliate links)


Looking for craft storage? Check out the storage & utility options available from Thirty-One! (consultant link)
Leaderboard