Leaderboard
728x15
Showing posts with label busy bags. Show all posts

Decorate a Gingerbread Man: Busy Bag Activity

I have twins, so I always think of everything in twos. This busy bag activity has been awesome because I was able to make one with two playing areas on it!

If you like this busy bag activity, be sure to check out our snowman, turkey, and owl projects too!


You will need:
  • Felt - brown and green (or another background color of your choice)
  • Gingerbread man shaped cookie cutter (mine are from this set - affiliate link)
  • Mod Podge or fabric glue
  • Scissors
  • Pom pom balls
  • Pipe cleaners

Directions:

This project is so simple you can put it together quickly. First take your gingerbread man cookie cutter and trace 2 shapes onto brown felt.


Cut out your shapes and cover the backs with Mod Podge or fabric glue.


Adhere to your background piece of felt. Allow to dry.


Once dry, collect some pom pom balls and pipe cleaners to use as decorations. I cut the pipe cleaners to size and bent them to look like frosting lines. 

(Note: this project contains small pieces that may not be appropriate for all children. Supervise this activity at all times).


Here's what your decorated "cookies" look like! I gave these to my toddlers and they had a blast.


They first pulled all the pieces off then set about decorating their own "cookies". So much fun!


When we're done, I like to store our activities in Large Zipper Pouches from Thirty One.


It's the perfect size to hold everything (and much more!). The zipper keeps everything contained and when we are heading out to a restaurant or doctor's appointment I can just grab the bag, throw it in my purse, and keep my kids entertained on the go without using a screen.


I especially love this owl print (Hoo's Happy)! If you'd like to order one yourself, visit my Thirty One website(affiliate link)

I am an Independent Consultant for Thirty One Gifts. I receive a commission on products purchased through my website. Opinions expressed are solely mine.

Build A Snowman: Busy Bag Activity


I love busy bag activities for my toddlers because it's a quiet, screen free activity that we can take anywhere. We've been having a lot of fun with puzzle activities made from felt - check out our owl and turkey projects. Now that Christmas and winter are fast approaching, I thought we'd try a snowman. He might be our favorite yet!


Here's what you need:
  • Felt - white, black, brown, orange, and a background of your choosing
  • Googly eyes
  • 3 buttons
  • Velcro
  • Mod Podge or fabric paint
  • Bowls (for tracing)
  • Scissors
Directions:

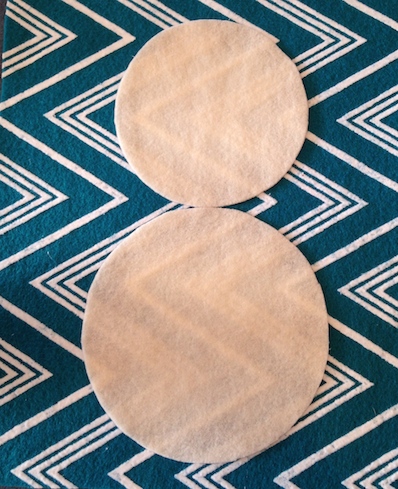
Start with your white felt. Trace 1 small and 1 larger circle (I used 2 bowls from my kitchen). Cut them out.


Apply Mod Podge or other fabric glue to the back of your circles.


Adhere circles to your background piece of felt. I had this cool patterned piece to use but any color is fine. Allow to dry.


While that is drying, collect your googly eyes and buttons. Attach a piece of velcro (the stiffer "hook" side only) to the back of each. 

(Note: this activity contains small parts and children should always be supervised while playing. If you are worried about small pieces, use felt circles for the eyes and buttons).


Then cut your felt pieces. You will need:
  • Carrot shape cut from orange felt.
  • Hat shape cut from black felt.
  • Scarf cut from red felt. Cut a rectangle and then make 2 small cuts in one end. Fluff the edges so it lays like the fringe on a scarf.
  • 2 arms from brown felt. Cut 2 equal sized rectangles with a triangle shape at the end. Make 2 small cuts at the larger end and fluff out for the "fingers."

Here are all the pieces together:


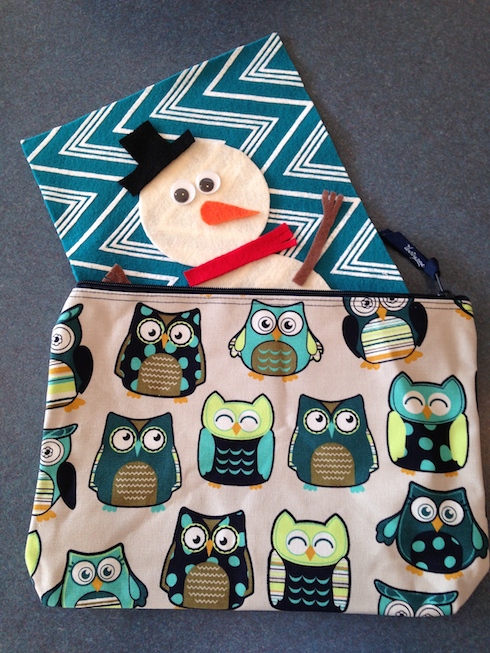
And your snowman once assembled:


I always give the puzzle to my toddlers fully assembled, then let them pull the pieces off and try to reassemble. They loved this one!


This is such a fun activity for them, and great for fine motor skills as well as spatial relations as they try to put all the pieces back in order.

When we're done, I like to store our puzzles in these large zipper pouches from Thirty One. 


It's the perfect size to hold everything (and much more!). The zipper keeps everything contained and when we are heading out to a restaurant or doctor's appointment I can just grab the bag, throw it in my purse, and keep my kids entertained on the go without using a screen.

Seriously, I love these large zipper pouches - especially in the new owl print, Hoo's Happy! If you'd like to order one yourself, visit my Thirty One website. (affiliate link)

I am an Independent Consultant for Thirty One Gifts. I receive a commission on products purchased through my website. Opinions expressed are solely mine.


Felt Turkey Puzzle: Busy Bag Activity

We made a Felt Owl Busy Bag Activity in September and my boys are still playing with it. They call it the "owl puzzle" and love to get it out and put the pieces back together. This inspired me to make them a "turkey puzzle" to start gearing up for Thanksgiving.


This is easy to make and turns out really cute! You need:
  • Felt - brown, orange, yellow, red, blue, green and a background of your choosing (I did a cream color).
  • Googly eyes
  • Velcro
  • Scissors
  • Mod Podge or other fabric glue

Start by tracing a circle out of your brown felt. This will be the body. I used a saucer and it was the perfect size. Cut out your circle.


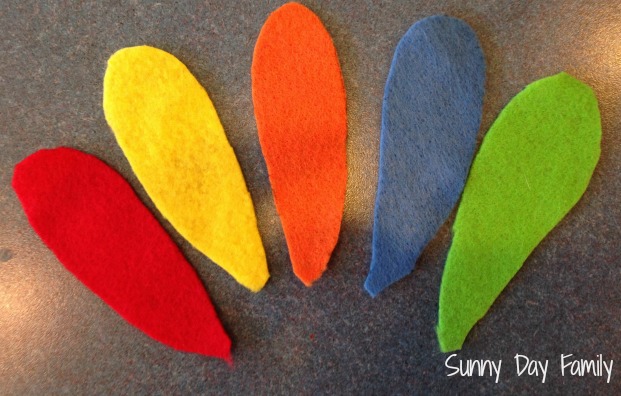
Then cut out 5 teardrop shapes for feathers - red, blue, orange, yellow, & green. I did the first one freehand and then traced each subsequent one so they were fairly uniform.


Cut out a small diamond out of yellow felt for the nose, a small teardrop shape out of red felt for the wattle, and a two feet shapes out of orange felt.


Add a small square of velcro to the back of your googly eyes. You want to put the stiffer hook side of the velcro on the back of the eyes so that it will stick to the felt.


I actually experimented with two different sized eyes - I liked the bigger ones but my 2 year old thought it looked like an owl, so he chose a smaller size. Go figure!

Next, cover the back of your brown felt circle in Mod Podge or fabric glue.  Adhere this to the center of your background piece of felt.


This is what your pieces will look like before assembly:


And after!


I gave the puzzle to one of my toddlers already assembled so he knew what it would look like. He immediately took all the pieces off and began trying to make his own turkey.


It was a little abstract but that's half the fun!


My toddlers love taking the turkey apart and putting it back together again. This is a great activity to put in a busy bag for restaurants, waiting rooms, or of course, the Thanksgiving table! No mess and they can play over and over again. Too cute and so fun!


Felt Owl Busy Bag Activity/Fall Craft Project


My boys are in love with owls right now. I suspect it has something to do with their new fascination with Daniel Tiger's Neighborhood or the plethora of Fall decor in stores, but they can't get to seem to get enough. They are also really into puzzles and crafts, so I thought I'd combine it all into this easy busy bag activity.

This is easy to put together and works great as part of a busy bag. It's like a felt owl version of Mr. Potato Head!  Toddlers and preschoolers will have lots of fun building their owls and taking them apart again. Here's what you need:

  • One sheet of sticky backed felt (this will be the body)
  • Various colors of felt for the wings, nose, and feet
  • Googly eyes (mine were 1.5" diameter)
  • Velcro
  • Optional Cardboard or Clipboard
To make your owl, first download this owl pattern from Sew Simple.  I used this for the body and feet.  Cut out the body and trace it onto your sticky backed felt. Cut out your shape.  

Cut out the feet shape and trace onto the colored felt of your choice. Cut out.

Cut a small square of colored felt for the nose.

Cut 2 teardrop shapes for the wings. Mine were about 2 inches long and 1 inch wide.

Cut a small square of velcro for the backs of each googly eye. Stick the square with the rougher hook side to the back of the eye like this:


This will allow it to adhere to the felt.

Here's what your pieces will look like:


And here's what it looks like when put together:


You have several options from here. You can leave it as is - your toddler will have a blast taking the features off and putting them back on! Mine were thoroughly entertained by this.


I found the sticky backed felt to be pretty sturdy, but you can always cut out a second owl body shape from cardboard and stick it to the back. 

Or, if you'd like to have a larger piece, I've created a background design that you can stick your owl to. This comes in handy if you'd like to attach it to a clipboard or hang on an easel.


You can find and print the background here

We use this as a re-usable busy bag activity, but of course if you'd like to make a more permanent craft feel free! You should be able to adhere the felt pieces with mod podge. It would make a great gift from your little ones.

Photobucket

Enjoy!


Leaderboard