Leaderboard
728x15
Showing posts with label drawing. Show all posts

Portable Dry Erase Drawing Kit

Make a Portable Dry Erase Drawing Kit for Kids using a Thirty One Beauty Bag!

My boys love the DIY Coloring Book we made earlier this week and they are always asking to play with it! We had a doctor's appointment and they wanted to take it along, but it's a little big and cumbersome for travel. I decided we needed a portable solution that will let them draw and color when we are away from home. I made this kit from a Thirty One Beauty Bag and it is the best thing to take when we need a quiet, screen free activity on the go!

This post features a product from Thirty One Gifts. I am an Independent Consultant for Thirty One, so I do make commission if you choose to buy any of the products from my Thirty One website. However, I was not compensated in any way for this article and all of the products shown are ones that I personally own and use in my home. Read my full disclosure policy.


Our portable dry erase drawing kit is made from a Timeless Beauty Bag, and it took just a couple of minutes to put together. 

There are 2 large PVC pockets on either end. I cut a piece of card stock (paper is fine too, I prefer card stock to give it a little strength) to fit - 6.5 inches by 9.5 inches - and slipped it inside each pocket.  You can also use pages from a favorite coloring book or printable coloring pages. You can find links to over 100 free printable pages here.


In the center, there is a small pocket which is a perfect fit for dry erase crayons.  

There are also elastic loops which hold our markers. I included a small marker with an eraser tip too (though my kids love to erase with their hands, which is why I buy the washable dry erase markers).

Now they are ready to color! The dry erase markers and crayons work perfectly on the PVC windows, so they can draw, erase, and start again.


And the best part, it folds neatly and snaps shut to make it easy to carry and travel. We take it to doctor appointments, restaurants, anywhere that we need some quiet, screen free entertainment. We even use it at home for quiet time!


My Timeless Beauty Bag is from an older catalog, it is available now in these 4 patterns:

You can find the Timeless Beauty Bag in the "Accessories" section of my Thirty One website. It can be personalized too for a small additional cost. 

Looking for more great ideas using Thirty One products? Visit my Organizing page!

Find washable dry erase markers and crayons on Amazon! (affiliate links)


DIY Reusable Coloring Book Plus 100+ Free Coloring Pages


My boys love to color. But they are still pretty little, so sometimes "coloring" means drawing a few squiggles and then asking for a new page. Those coloring books can add up! I love using free printable pages (and will share some favorites at the end of this post) but paper and ink can get pricey too. I found a great way to keep my boys happy and save some money by making our own reusable coloring book!


This project is so easy - you might have everything you need at home already!


All you need is:
  • 3 Ring Binder
  • Sheet Protectors (I like Heavyweight or Super Heavyweight)
  • Coloring Pages or plain paper
  • Dry Erase markers or crayons - get the washable kind!

Put your coloring pages or plain paper in the sheet protectors. You can print free coloring pages online (keep reading for links to some of my favorites) or tear them out of a coloring book. You can put them in the sheet protectors back to back or I like to do a single sheet in each protector so that you have a mix of pre-printed pictures and blank pages.

One of my favorite parts of this book is that you can totally customize it to your kids' favorite characters, holidays, whatever they like!


Once your pages are loaded just place them in your 3 ring binder. Make it as large or small as you'd like! 

I love binders that you can slip your own cover into. If that's what you have, I've made you a free printable cover too:
CLICK HERE to download your free cover.

Once everything is assembled you are ready to go. Give your kids some washable dry erase markers or crayons and let them color!


One of my boys LOVES to erase his art - it wipes off with a paper towel but you may need to give it a good cleaning with water (or a baby wipe!) every now and then to keep it totally clean.


Ready for more coloring!


Again, you can fill your book with anything that your kids will enjoy. I've pulled together some of my favorite free coloring page resources to give you a head start:

90+ Coloring Pages from Kids Activities Blog

70 Coloring Pages from My Life & Kids

Huge Coloring Page Collection (great holiday sets!) from What Do We Do All Day?

Coloring & Activities Collection from Every Star is Different

Horse Coloring Page from Arts & Crackers

Apple Coloring Pages from The Good Long Road

Space Coloring Pages from In the Playroom

Snowflake Coloring Pages from In the Playroom


Dinosaur Coloring Pages from Red Ted Art

Penguin Coloring Pages from Kid's Creative Chaos

Design Your Own Monster Truck from School Time Snippets

Number Coloring Pages from 3 Dinosaurs

Dolphin Coloring Pages from Itsy Bitsy Fun

And you can find your favorite character sets here:


Need any supplies to make your coloring book? Here you go! (affiliate links)


Easy Paper Heart Banner Craft


After a week of being stuck inside with colds, we needed to do some happy Valentine's Day decorating. I thought our mantle was the best place to start, and since my boys are really into drawing with markers right now, this was the perfect easy craft for us to try. This craft would also work great in a playgroup or preschool setting, as each kid can decorate their own heart.


All you need for this craft is red & pink construction paper, markers/crayons/paint - whatever you want to decorate your hearts, and paper fasteners.

Start by cutting out large hearts from red & pink construction paper. I make hearts like I learned as a kid myself - by folding lengthwise, drawing half a heart, cutting it out, and unfolding.


You can make as many as you'd like for the length of your banner. I did 12 total for my mantle (6 of each color).


Then let the kids go crazy decorating their hearts. My boys love coloring with markers right now, so that's what they wanted to do. You can do painting, crayons, glitter and glue - be creative!


Once all your hearts are decorated, secure them together with the paper fasteners. I alternated red and pink.


That's it! Your banner is ready to hang. I used clear command strips to hang mine but you can use tape as well.


Our snowman looks much happier now and ready for Valentine's Day!

This was a really simple and customizable craft that is a lot of fun for kids of all ages. We had a great time putting it together and now we're ready for Valentine's Day!

Do you have a lot of craft supplies? Check out my Complete Craft Storage Solution!

Need any supplies for this project? Here you go: (affiliate links)


Bubble Wrap Painting

Painting on Bubble Wrap

We had so much fun making our Bubble Wrap Road that I thought there must be something else we can do with our big roll of bubble wrap. My boys love to paint, so why not put the two together and see what happens?

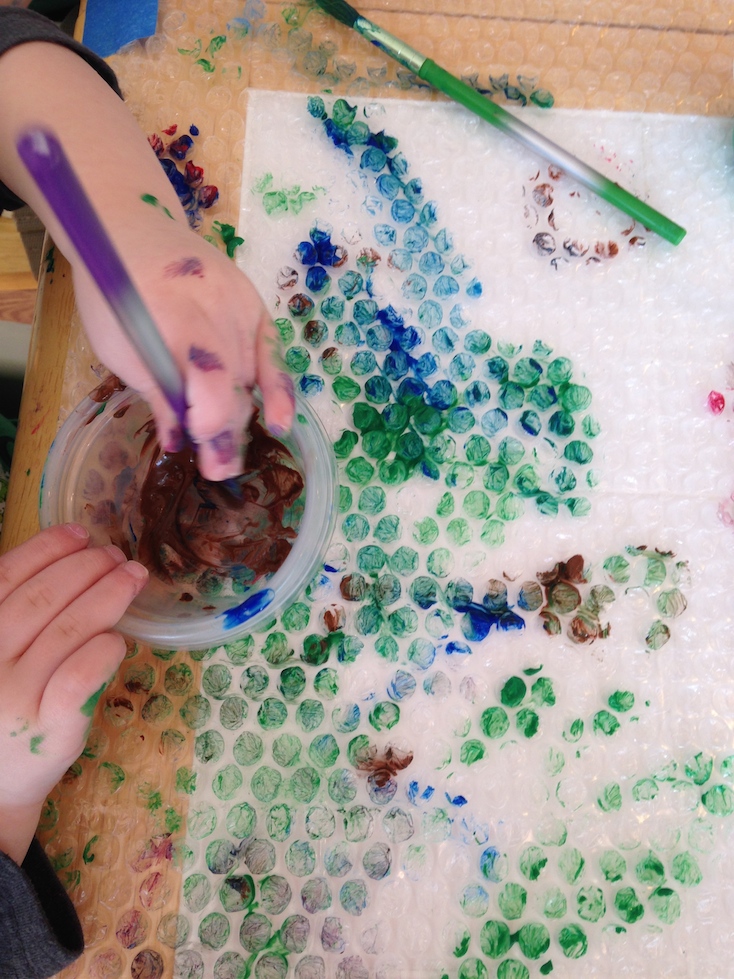
We had a lot of fun with this craft, and it's pretty simple to set up. I put a big sheet of bubble wrap down on our kitchen table and taped it down with painter's tape. I poured some washable paint into small cups, put out some brushes, and invited the boys to create.


They started with the brushes and loved how bumpy their "canvas" was.


Then they really got into it and started mixing colors.


They asked for more colors and of course I obliged.


Then they gave up the brushes all together and started finger painting. It was fun to pop the bubbles and make art at the same time! Even my "no mess" boy got into this one.


I hung our finished project on the sliding glass door to dry, and it was quite pretty with the sun shining through! We could easily turn this into a sun catcher craft. 


This was a great project that checked all my favorite boxes - easy, inexpensive (save those packing materials!), sensory and fun. Both of my boys enjoyed it immensely and we will definitely try it again!

Need any of the materials used in this activity? Here you go! (affiliate links)


Looking for craft storage? Check out my Organizing & Totes page!


Footprint Angels with Cotton Clouds

I've been thinking a lot about angel crafts for Christmas this year as it will be the first since my dad passed away. Something about angels is very comforting to me right now and makes me feel like he's watching over me. 

I love hand and footprint crafts for toddlers as they make such great gifts and keepsakes. I came up with these footprint angels to hang on our refrigerator as a reminder that Grandpa is with us.


You will need:
  • Blue construction paper.
  • Washable paint - white, brown, yellow
  • Black marker
  • Cotton balls
  • Glue
Directions:

Paint your child's foot with white washable paint and press down onto the construction paper to make your angel body.

Paint your angel's head, halo, and wings using brown and yellow paint. I used a marker for the eyes and smile. Be creative!  Depending on their age, kids can certainly do this part for themselves. Allow to dry.

Then, put some glue on a paper plate. Give your child some cotton balls to dip in the glue and stick onto the paper to make clouds. This was by far the best part for my toddlers.


That's it! All done!


This was a really easy craft to do with my toddlers - making the cotton ball "clouds" let them be creative and add their own special touch. We love our little angels!


Chalkboard Pumpkins

I've seen so many wonderful ideas to decorate pumpkins without carving, but none of them seemed just right for my 2 year old twins. They love to paint, but they sometimes lose interest quickly and want a new piece of paper. I imagined them painting a pumpkin with one stroke then wanting a new one! I'm too frugal for that, so I wanted something that they could enjoy more than once.

They love chalk, and sometimes love erasing more than drawing. They really enjoy the repetition of drawing, erasing, and starting again. I thought we could incorporate this into our pumpkin decorating this year and our Chalkboard Pumpkin was born!


The secret to this project is this awesome chalkboard paint that I found at our local craft store. You can find it on Amazon (affiliate link). I used another chalkboard paint for a different pumpkin project and the DecoArt Clear worked a million times better. It doesn't peel and holds up to toddler heavy-handedness.


All you need is your pumpkin, chalkboard coating, and a sponge brush. Try to select as smooth a pumpkin as you can for a better drawing surface.


Apply your coating with the sponge brush in 2 coats - one going vertically down the pumpkin and one going horizontally around.  Wait an hour before applying the second coat.


Once your second coat is dry (mine took about an hour), prime the surface by rubbing some chalk on it and wiping off.


That's it! Let your toddlers enjoy drawing and erasing as much as they want. I got mine started with a jack-o-lantern face and let them embellish from there. It was fun! And it's great because we can do it over and over again.


Much better than a one time painting project. Give it a try and let me know what you think!

Owl Handprint/Footprint Craft with Free Printable Background

I love doing handprint/footprint crafts as gifts. We made owls today for my mom's birthday present - I actually didn't take any pictures while we were making them but it turned out so cute that I had to share.


I repurposed the printable background from our Felt Owl Busy Bag Activity as the background for our artwork.  I used a sponge brush to paint my toddler's hand (with washable paint of course!) and placed it fingers pointing down, with the base of the fingers on the branch.  Then I repeated with his foot, with the toes pointing up.  I let them overlap a little to make the body size look right.

I painted the eyes and nose, and then used a black Sharpie for the pupils (do this after it is completely dry).  Super cute and easy. Grandma will love it!

Download the printable background here.

Sweet Potato Stamps: Fun Fall Art!


We've had an abundance of sweet potatoes in our garden this year, and we've been enjoying them in all kinds of foods. But due to some overzealous picking by my toddlers, we had a couple really small ones. Looking at them I remembered making potato stamps as a kid myself, and thought they would be the perfect size for my little ones to create some art. Voila - sweet potato stamps!


I started with these 3 little sweet potatoes. You could also do these with baby yukon or redskin potatoes.


I washed off the dirt and cut them in half to make 6 stamps.  I decided to do easy shapes - circle, triangle, and sort of a ghost shape (thinking Halloween) that ended up more abstract. It still worked.

I used a sharp paring knife to first score my shape into the cut end of the sweet potato.


Then I carefully cut a circle around the edge.


I was then able to very carefully pull off the edges around the shape so that it stuck out in the middle.


Here's my 3 stamps (I made 2 of each for 6 total).


When painting with my toddlers, I like to use a big roll of paper and tape it to my kitchen table with painter's tape. This allows them to paint away without my worrying about the paper moving around or them going off the edge of the paper (too much). We only use washable paint though to be safe.


We picked out some nice fall colors for this and I put the paint in a clean egg carton for easy dipping and stamping. 


They were a hit! The small sweet potatoes were the perfect size for 2 year old hands, and nice and sturdy for them to stamp on the paper. They had a blast dipping in the paint and stamping out the shapes. My animal lover called them "paw prints" but I think they ended up looking like leaves.


This was a really fun way to spend our Sunday morning and so cheap and easy! Enjoy!

Photobucket

Easy DIY Coloring Pages for Toddlers


My boys have really gotten into art lately. They love to color but regular coloring books are just too small and too detailed for them right now. And they can get expensive! I decided to make our own coloring pages instead using floor paper and cookie cutters. These are perfect for little ones - big, simple, and can be customized to their favorite things.

I used our Crayola Floor Pad (affiliate link) for these, but any large paper will work.

The shapes are from my Wilton Cookie Cutter Set (affiliate link). I have had these for years (before I had kids!) and I use them for so many things!

All you do is trace the shapes onto the paper. Trace with pencil first then go over your outlines in marker. I also found tracing inside the cookie cutter was easier.


You can pick your child's favorite things - we did vehicles and animals because that's all the rage around here now. I like that the shapes are just simple outlines, and bigger kids can use them as a starting point to add in their own details. My set has holiday shapes as well, so these can make great Halloween and Christmas projects too.

Have fun!

This post contains affiliate links. I make a small commission if you purchase through these links, but the content is not sponsored.  Disclosure Policy
Leaderboard